Girls look so adorable in sun dresses and today I want to share the free paneled sun dress pattern with you. It is a cut-by-measurement pattern which means, there are no full sized templates necessary. You will only need small armhole cutouts to print. Nothing to tape either. The rest is cut by measurements according to a provided cutting chart. How cool is that?
Unfortunately I don’t have a little model because I’m making a size 0-3m. Why? It’s easy to take pictures of the steps. The bigger the project, the more I’m lacking adequate space on my work/photo space. I want to provide great pictures so you can recreate this dress with no problems. I’m sure I’ll gift this little dress to someone who has a new baby coming 😉
Free Paneled Sun Dress Pattern
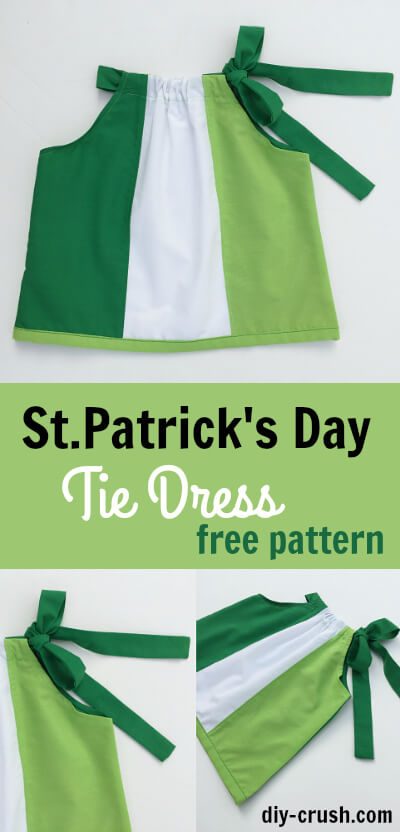
For this project I’m using one of my favorite fabrics, broadcloth! What is broadcloth? Mainly broadcloth is used as lining material or for something small that should wrinkle that much. Frankly, I use it a lot! For clothing! More on broadcloth later but for today, I’m making an entire baby dress from it! Oh and this pretty broadcloth is from Hancock Fabrics, my favorite local fabric store!
Gather Your Supplies:
- fabric (I used broadcloth)
- pack 1/2″ bias tape (or you can make your own using THIS tutorial)
- armhole cutout —–> download here!
- sewing machine
- serger (optional)
- iron
- straight pins
- scissors
- safety pin
I thought it would be cute to use St. Patrick’s Day colors because that’s the next holiday coming up. Sorry if you tune in after St. Patrick’s Day but you will soon find that there are more cute color/print combos to make this little sun dress in than in green/white!
I’m sharing the free chart for sizes newborns through 24m. Maybe some day later I’ll increase this cart.

Follow the instructions:

- Place a safety pin to the right corner, right into the center, about 1″ away from the edges.
- With a straight stitch, sew the short end and along the long edges.
- Leave a 1″ opening by the other end. Back stitch when you start sewing and when you end.
- Grab the safety pin through the fabric and guide it towards the opening. Then turn strap with right sides out, press and close the opening with your machine. You may top stitch along the entire straps if preferred.
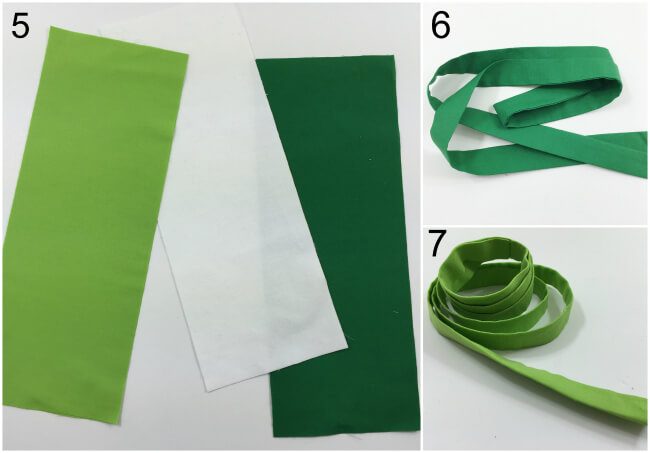
5. These are your cut dress pieces.
6. The finished should ties
7. Custom made binding (see this tutorial on how to make your own binding, although for straight edges like on this dress you won’t need to cut the fabric on the bias. A straight cut fabric piece as given above in the cutting chart is sufficient)
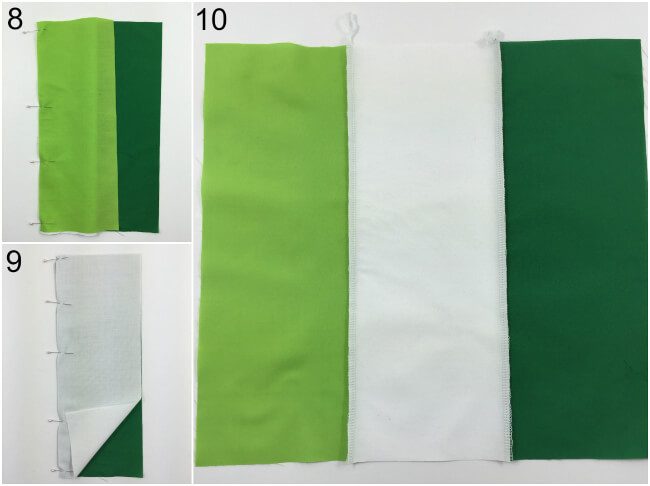
8. Place two panels (right sides & print direction going down) together and pin, then sew with a 3/8″ seam allowance. Serge/zigzag stitch.
9. Pin other panel to the remaining edge, sew and serge/zigzag stitch.
10. This is now your first dress side with 3 panels sewn together. Repeat with other set of 3 panels.
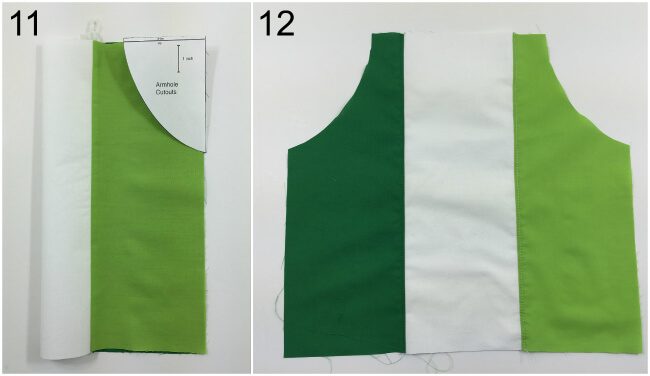
11. To cut out the armholes, fold over one side of the dress and place the armhole cutout into the upper right corner. The edges of the cutout should meet the fabric edges.
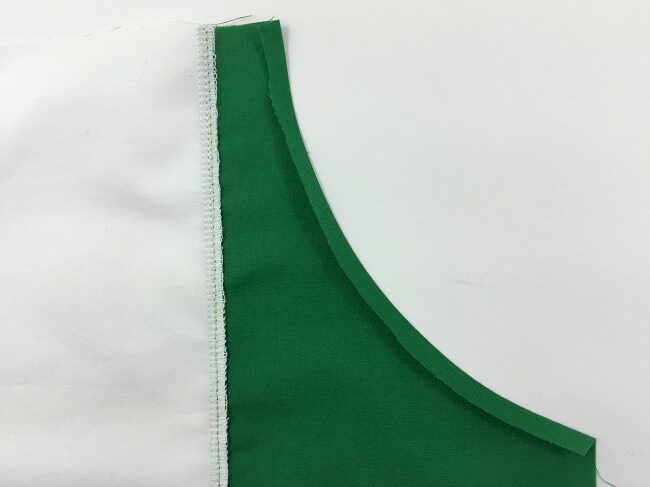
12. Trim around the template. This is how your dress piece looks like now. Repeat with the other dress piece.
To continue please click on page 2 below!
- Free Snowflake Tumbler Wrap Designs for Download - September 24, 2023
- Free Welcome To Our Farm SVG File - July 17, 2021
- Professional Overthinker SVG File – Download Today! - July 8, 2021
This is so cute..similar to pillowcase dresses.
Need armhole template. Thanks for the cute pattern
To download the armhole cutout you want to please sign up via email through the pink/white at the end of the post (page 2).Then you will receive the password to the free download page. Thank you so much for visiting!
I like it pattern
This is such a cute little dress. I love the 3 panel look 😀
A very useful tutorial !! I ‘m going share it on My Facebook sewing Group!
need armhole template
Please see paragraph “Gather your supplies”. It tells you how 🙂 Thanks for visiting!
I would like the arm hole template please.
Please see paragraph “Gather your supplies”. It tells you how 😉 Thanks for visiting!
Thank you for the pattern! I sat down to make this but there’s no seam allowance listed.
Thanks for visiting! It’s the standard 3/8″.
Thank you! I made one last night, with a matching bucket hat. Very cute!! Thanks again for the pattern!
How long does it take to get the secret password via e mail? It is now 3:49 in the afternoon and I started signing up at 9:30 this morning! In fact, I signed up on several of other patterns on the website. Hmmm, I know I am old (67) but not senile I am capable of following directions even at my age. I read through your comments as well so I know I’ve read every step to getting the magic word. Any change my granddaughter will get the dress before she graduated from high school?
Did you check your spam folder?
Armhole template please
I just added the direct download link to the list of supplies. Thanks for checking out this post!
I want to try this pattern. I have beautiful fabric that I want to use for it. If I want just one fabric, no panels, do I just deduct seam allowances ( 3/8 *2) from the total width? Might be a silly question but I’m new to sewing!
This is a very versatile pattern. Thanks……..