Once you flip up the lining piece, this is how your pouch project will look like.

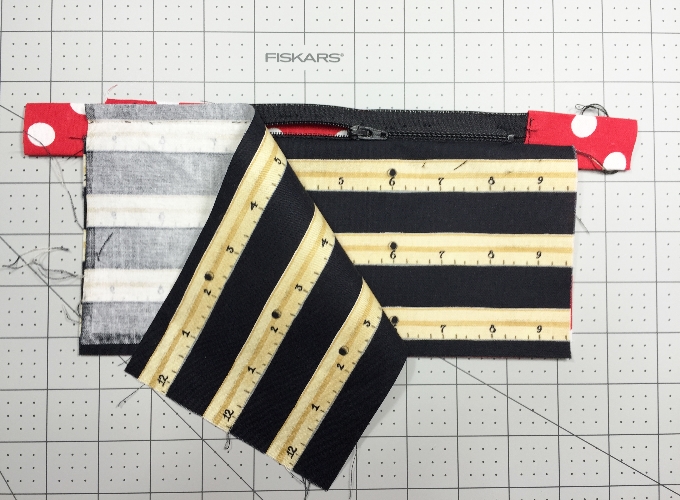
It’s time to sew the other side. Place the second lining piece with right side up down on your work mat.

Then place the zippered piece’s lining with right side down onto the lining. Now you should have both lining fabric pieces face each other with their right print sides.
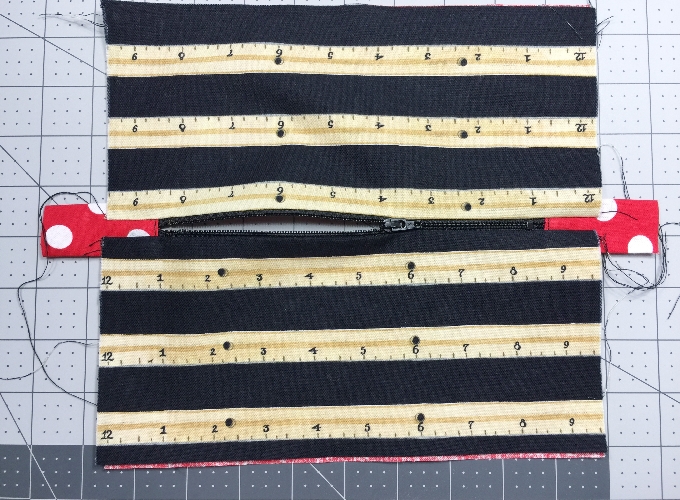
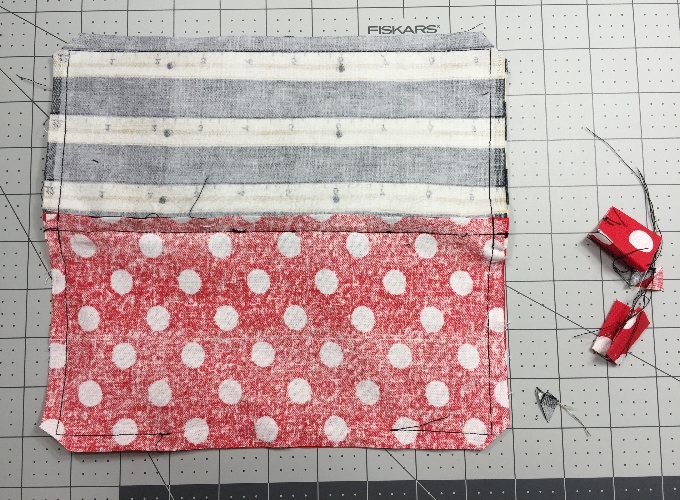
Place the remaining outer fabric piece with right side down, onto the zippered outside fabric. Both should also face each other with their right sides. The print direction should face down. Also, open the zipper about 3/4 of the way.
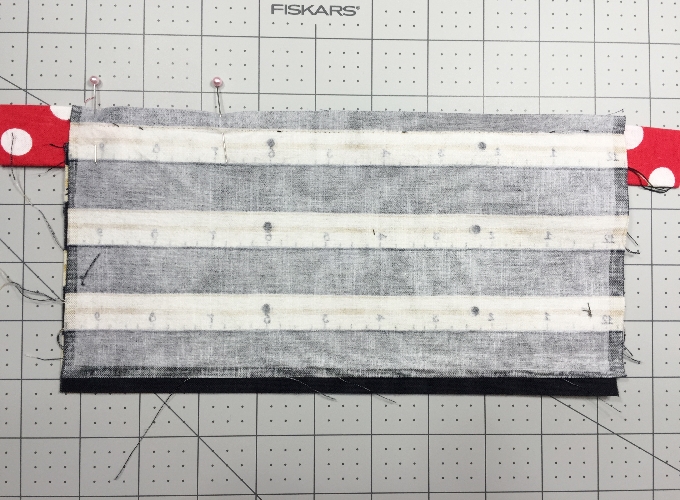
Since the zipper pull is now open about 3/4 of the way, start pinning at the left side. Start sewing all 4 fabric layers plus through the zipper, along the top edge with a 3/8″ seam allowance. Stop half way through because you don’t want to sew past the zipper pull. Backstitch and trim off the threads. Now close the zipper all the way and then continue pinning/sewing the rest of the top edge. Remove all pins.
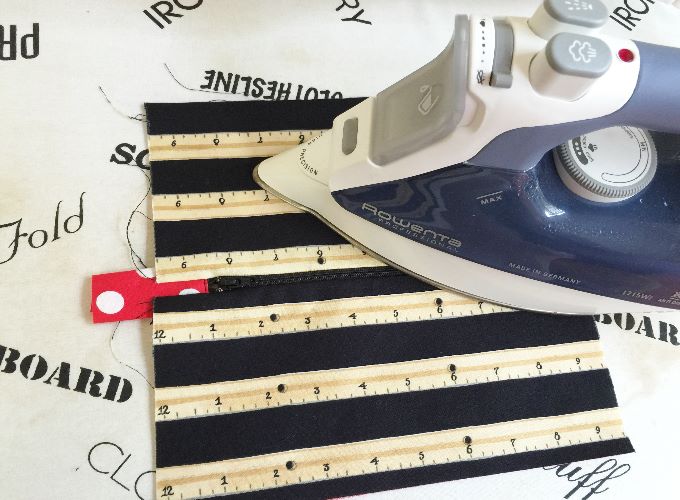
Unfold the layers so that each a lining and an outer fabric layer is on each side and the zipper in the center. Press the fabric along the zipper, be sure to pull both fabric layers away from the zipper so you won’t press any creases into the fabric. Double check the underside to make sure everything is nicely pressed.
At this time you could top stitch on the outer side, along the zipper on both sides. I didn’t top stitch this pouch. Move the zipper pull into the center or open it all the way. This is essential for turning the pouch later on.
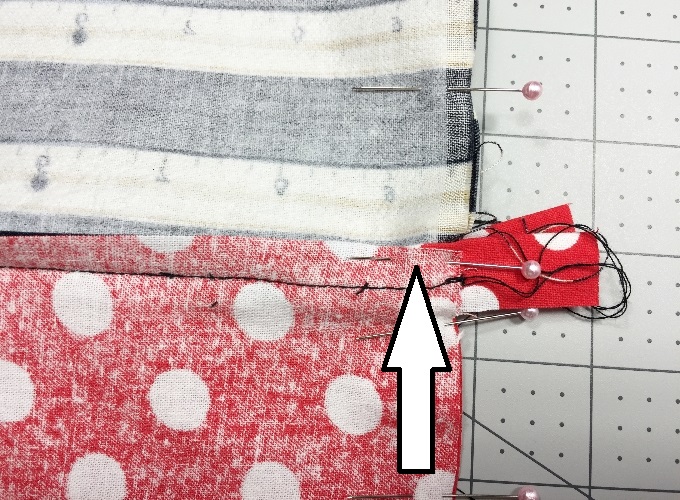
Now it’s time to close the sides and the bottom and finish this pencil zipper pouch. Grab both outer layers and lift up the pouch. Then lay it back down with both outer layers facing each other, as well as both lining layers facing each other.

Fold up the zipper’s seam so that it reaching into the outer layers. If you did top stitch the zipper, your seam allowance will automatically face towards the outer layers. Pin the entire pouch together (pin both outer layers and both inner layers together).
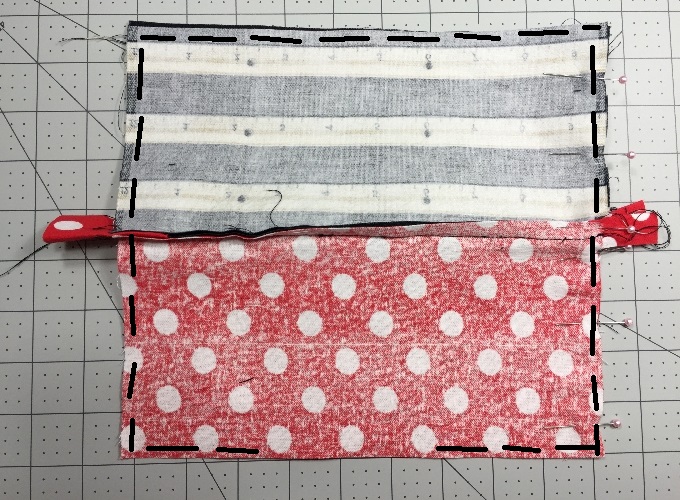
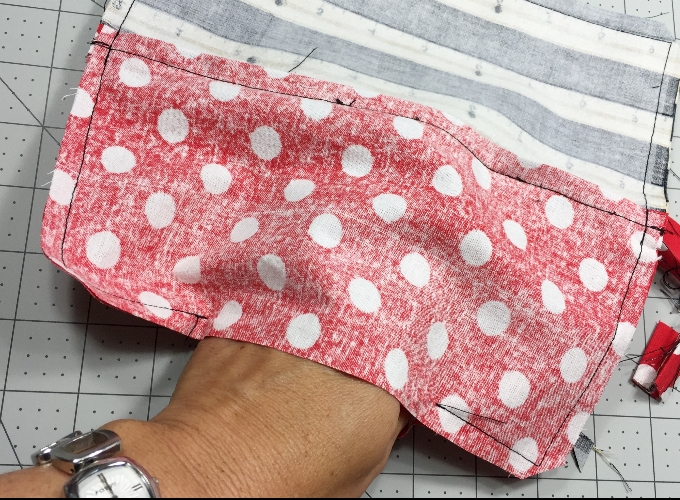
Leave about a 4″ opening in the center of the lining so you can turn the pouch. Backstitch the beginning and start sewing with a 3/8″ seam allowance at the opening. Sew all around the pouch and very carefully over the zipper tab areas. Be sure to peek under your presser foot before you sew over these areas to make sure nothing has shifted. When you reach the bottom of the lining where the opening is, backstitch before you trim off the threads.
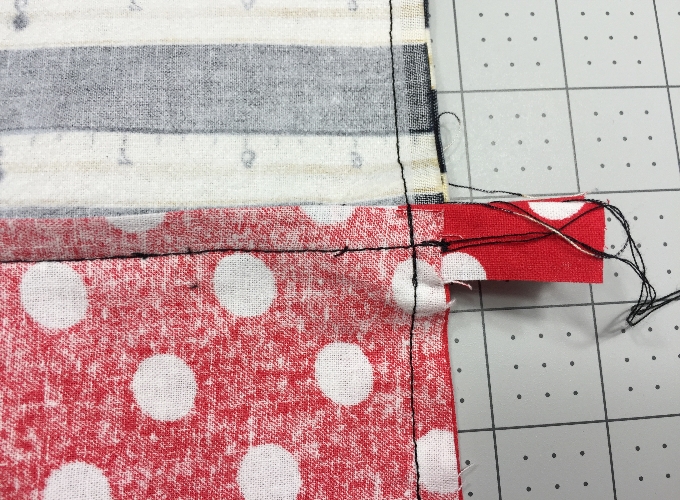
Here is a close-up of what my stitches along the zipper tab area look like.
Trim off all four corners diagonally and also trim off both zipper tabs.
It’s time to turn the pouch with right sides out. Reach into the pouch and grab the corners of the outer fabric. Pull them through gently and carefully poke out all four corners with help of a turning tool or a pair of closed scissors (they should have rounded tips).
Press and top stitch the opening on the lining fabric with a 1/8″ seam allowance.

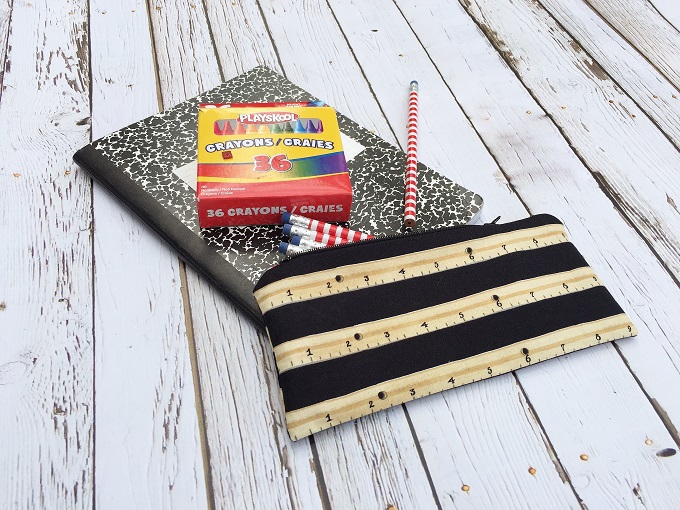
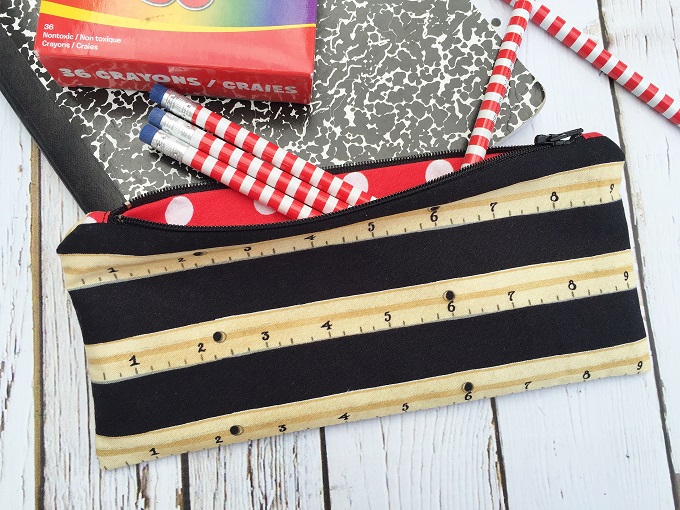
And push the lining back into the pouch through the zipper. You are done! I can’t wait to give this pouch to my daughter who is anxiously awaiting to use it! Hope you liked it free zipper pouch tutorial!
————————
Would you like us to email you when we have a new post up? You can choose what interests you! Then hop on the list by entering your email below! We promise, we only send you 1-2 emails per week!
We are linking up to some of these awesome blogs! Come over to our link party on Thursdays at 7pm EST!

This zipper pouch is so fun! Thanks for the full detailed instructions for us to make our own!
Deb, thank you sew much for checking this post out today! It’s a pleasure to provide free tutorials for everyone!
That ruler fabric is very cute, makes a great pouch!
Thank you, glad you like it!
Great tutorial. I love that ruler fabric too! 🙂 Thanks so much taking part in our tour!!
I’m excited to be part of that tour! Thank you for visiting!!
That pouch is cute! Ohhhhh, I wonder if they make a multiplication table fabric?
That would be awesome! I have to search for that type of print now! 😉 Thanks for visiting!
Yay!!!
This is a great tutorial! I really love your ruler fabric.
Thank you! So glad you like it!
I’m a sucker for a zipper pouch. =) Love the ruler fabric!
Me too! Haha! Thank you for stopping by!
Such great fabric!
Thank you, Susan! Happy you have stopped by today!
This turned out so cute! Thanks for sharing.
Thank you, Christie! So nice that you visited!
Thank you for the tutorial, I’ll make one but for my knitting stuff xD!
Great idea!! Thanks for your visit!
This is just what I was looking for! Thank you so much!
I’m happy you like it, Alison!! Thanks for visiting!
This is a great tutorial! Thank you!
Thank you, Liesel!! I appreciate your visit!
What a great little tutorial! Perfect for back to school.
Thank you so much, Sharon!!
Thank’s for this tutorial!
You are welcome! Thank you so much for stopping by!
Love that ruler fabric, Denise. It’s perfect for a pencil case. I’ve featured your fab tutorial today.
Thank you SEW much!!! I appreciate it!