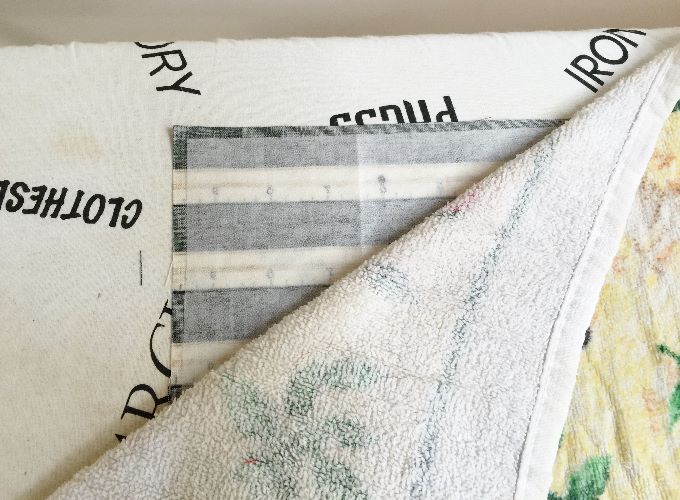
Not only for back to school but for any day and time a simple zipper pouch is welcome in my house. I recently came across a super cute fabric with rulers on it and thought it would make the perfect pouch for pencils for my kids. See the perfect pencil zipper pouch tutorial today!
Pencil Zipper Pouch Tutorial
This project is part of this back-to-school tour organized by Sprouting JubeJube and Lulu & Celeste:

During this tour you can enter to win some fabulous prizes!! Be sure to read the entire post! Monday’s prize is 1 PDF pattern from Filles à Maman and 1 PDF pattern from The Eli Monster (excludes bundles).
This giveaway runs from August 22 12:00 am EDT until August 23rd at 11:59pm EDT.
*CLOSED*
Please visit Monday’s host which is Sprouting JubeJube and check out the rest of today’s stops on the tour:
DIY Crush – BLAVERRY – Sew and Tell Project – The Wholesome Mama – Call Ajaire
Here is the list of all participating blogs:
Call Ajaire * The Wholesome Mama * Sew and Tell Project * BLAVERRY * DIY Crush * Phat Quarters * Mahlica Designs * Handmade Boy * Kaleidothought * The Berry Bunch * Filles A Maman * Sprouting JubeJube * Sew Happily Ever After * Tales of a Tester * 5 out of 4 Patterns * The Crafting Fiend * Create 3.5 * Sew Sophie Lyn * Sweeter Than Cupcakes * Wining Wife * Paisley Roots * The Eli Monster * Cindy Parrett Blog * Sew Starly * Élégantine! * Gracious Threads * Lulu & Celeste * Sewing By Ti * Amazing Adventures with Bubba and Bug * Simple Life Pattern Co. Blog * Inspinration * Mama You Can Make it For Me * Moon Star
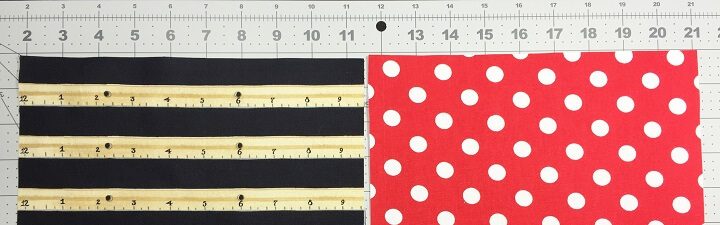
Sewing a zipper pouch is not difficult at all! If you have never sewn one, this tutorial is for you! It’s detailed and I hope to have provided great images so you can see every little detail. So grab some fabric, actually two coordinating prints, as this pouch is fully lined and has no exposed seams. You also need some interfacing (not mandatory although it helps to keep the pouch sturdy longer) and an all purpose zipper. The finished pouch measures 4″ x 8.75″ and holds standard length pencils.

*This post contains links to affiliates. Please see full disclosure here.
List of materials used in this tutorial:
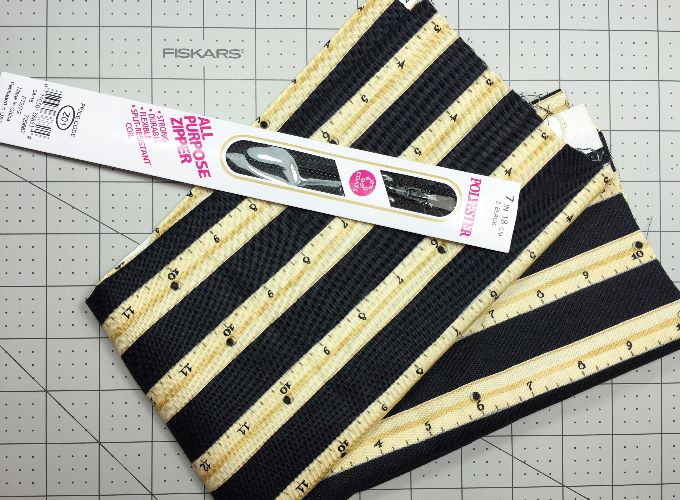
- I used this [eafl id=16553 name=”ruler fabric” text=”ruler fabric”] but if it’s not available anymore, [eafl id=16554 name=”perfect pencil zipper pouch” text=”here”] are plenty of other cute ruler prints.
- 1x [eafl id=16555 name=”coats 7" all purpose zipper” text=”Coats 7" all purpose zipper”]
- OPTIONALLY fusible interfacing (my favorite is [eafl id=16557 name=”Pellon fusible interfacing” text=”Pellon fusible interfacing”])
- Straight pins
- Sewing machine ([eafl id=15675 name=”I use this one brother sewing machine” text=”I use this one”])
- Scissors
- [eafl id=15141 name=”Rotary Cutter” text=”Rotary Cutter”]
- Iron (I love my [eafl id=16045 name=”rowenta” text=”Rowenta”])
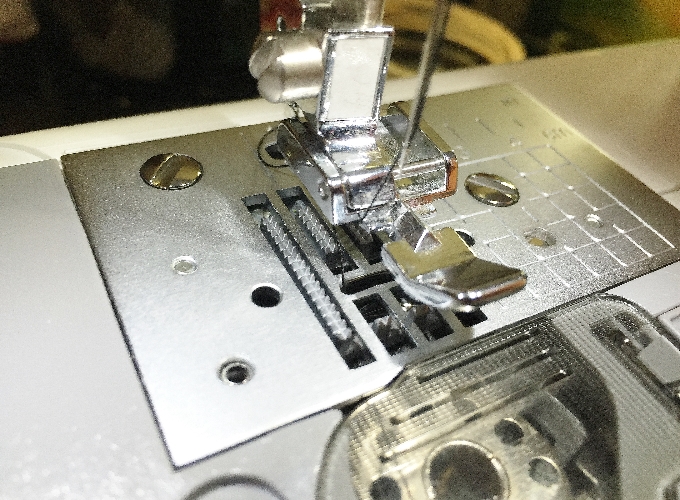
- zipper foot
The image below only shows one fabric and my zipper.
Sewing instructions:
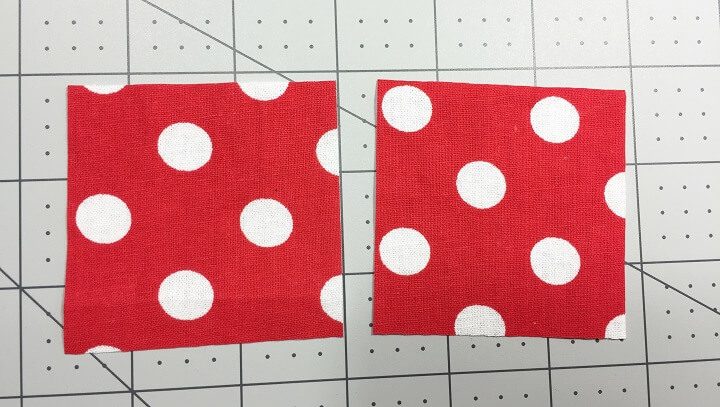
Cut two pieces 4.75″ tall x 9.5″ wide for the outside and two pieces for the inside. Cut two pieces 2.5″ x 2.5″ for the zipper extension tabs. If preferred for a bit more stability, also cut two pieces 4″ x 8.25″ fusible interfacing.
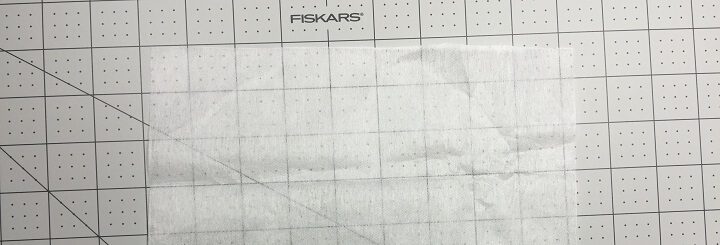
Following the [eafl id=16557 name=”Pellon fusible interfacing” text=”Pellon fusible interfacing”] instructions, iron the interfacing on.
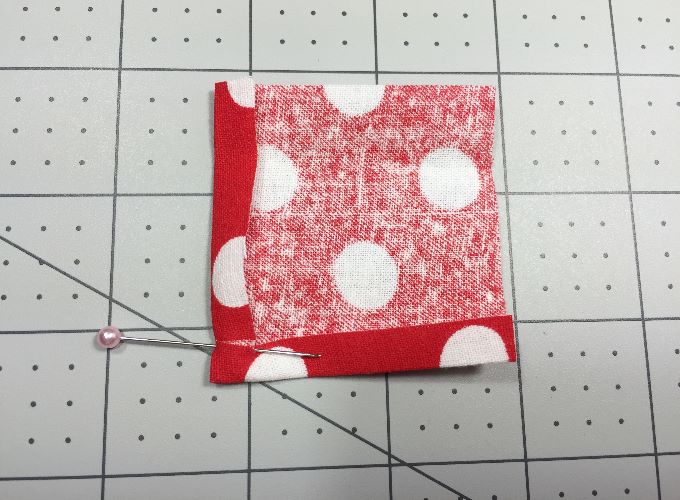
Take the zipper extension tab pieces and place them right side down, then fold in the left and bottom edges 1/4″. Press the folds down. I only used a pin to keep the folds down for this image.
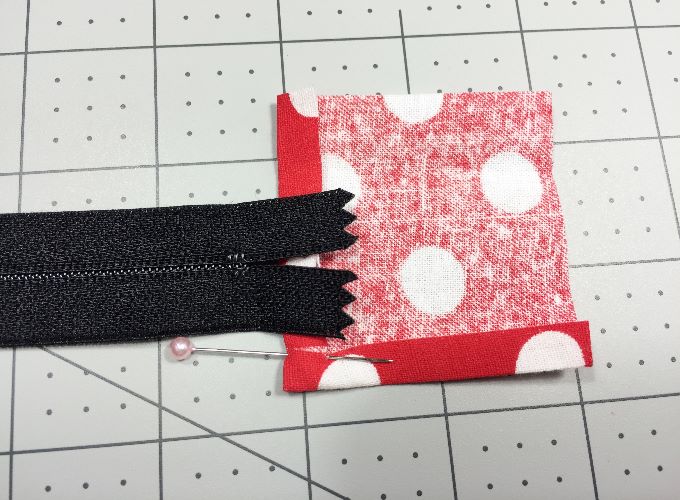
Place your zipper’s end with right side down onto the left fold and leave about 1/4″ room from where the actual zipper part ends.
Fold down the top edge of the fabric piece so it reaches into the center. Pin in place.
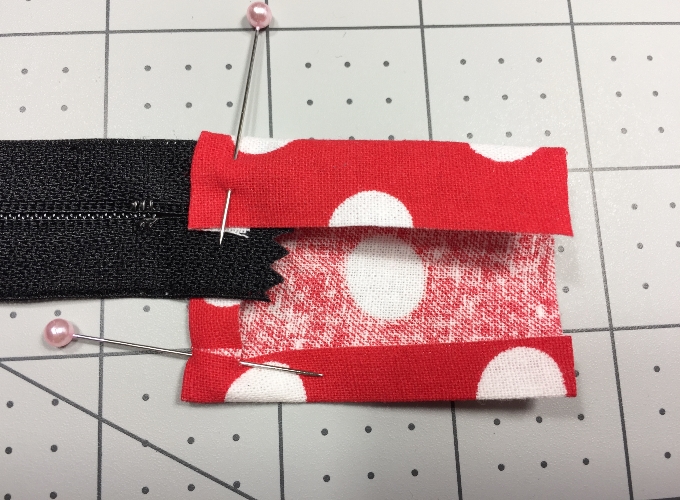
Fold up the bottom fold of the fabric and overlap it in the center. Pin in place.
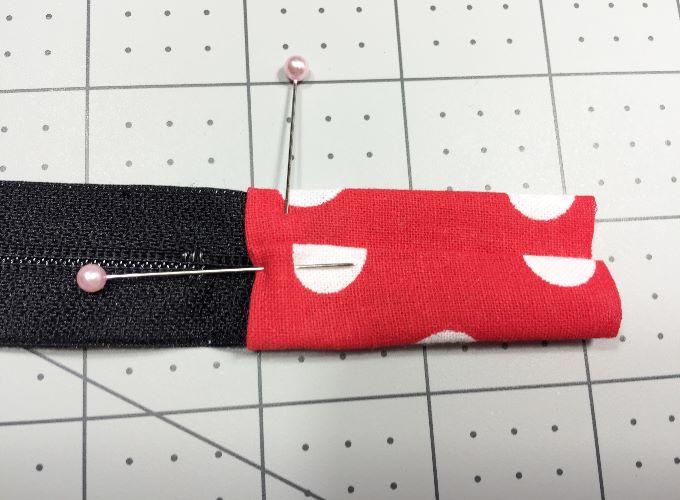
Sew along the left side of the fabric, backstitch the beginning and end. Keep a seam allowance of 1/8″.
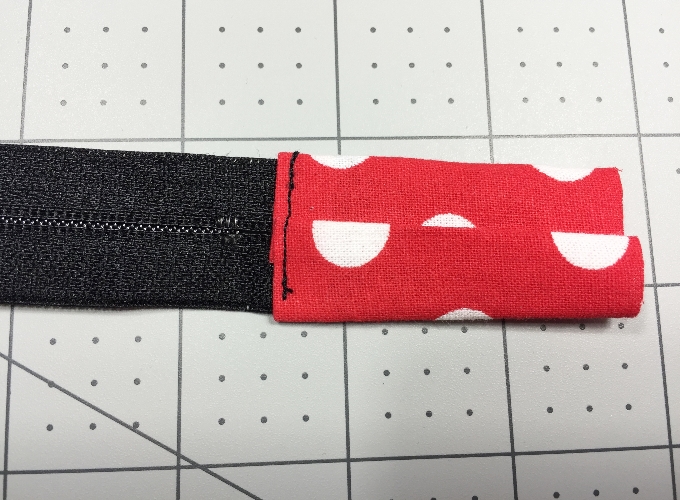
Repeat this step with

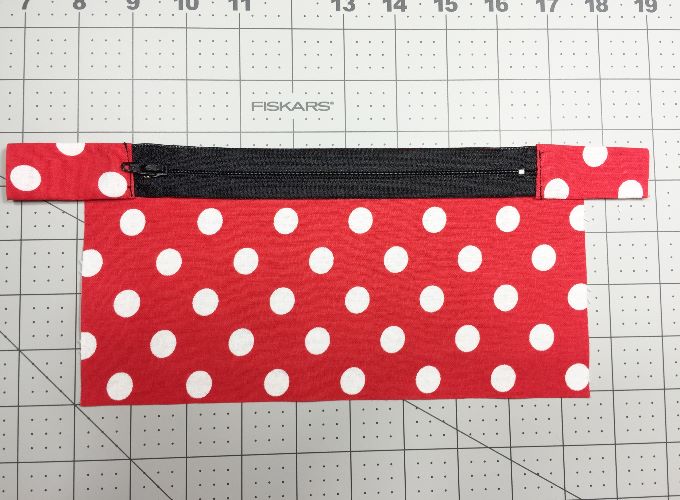
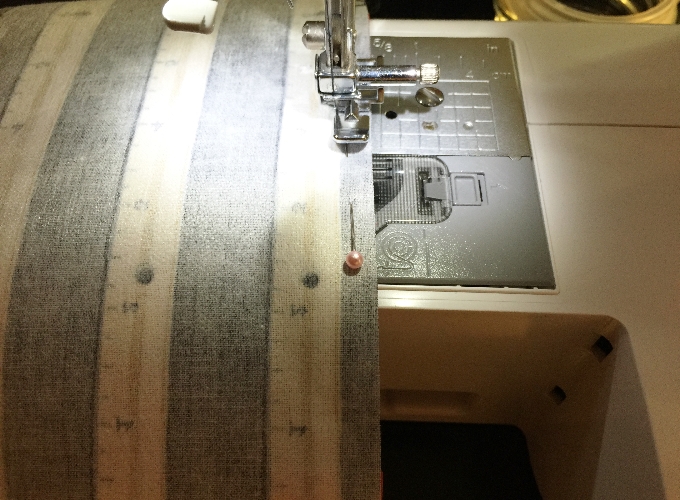
It’s time to sew the pouch pieces! Place one of the lining pieces in front of you and place the zipper with right side up along the top edge as shown in the image below. Be sure to center the zipper so that both of the fabric tabs at each end reach out the same.
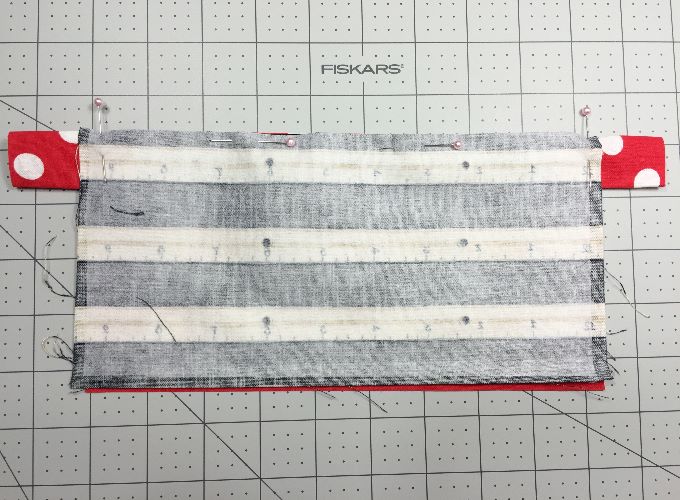
Take one of the outside pieces and place it right side down (and be sure to check that the print direction is going down as well). Align the top and side edges, then pin in place. The way you position the pins does not really matter. You can also use clips. Before you start sewing you would remove the pins one by one to not sew over them.
It’s time to get your sewing machine ready. Install your zipper foot! My [eafl id=15675 name=”I use this one brother sewing machine” text=”Brother sewing machine “]comes with a zipper foot but yours may need a separately purchased one. It is really crucial to use a zipper foot as a regular foot won’t allow to sew close along the zipper which is needed to make a nice zipper pouch. Position your zipper foot to sew at the left side.
First, you want to position your zipper pull to the center of the zipper. It will get moved later on.
Start sewing at the left top edge with a seam allowance of 3/8″ which is about the width of the zipper foot. The zipper foot’s right edge runs along the fabric edge. Backstitch first and then sew until shortly before you reach the zipper pull.
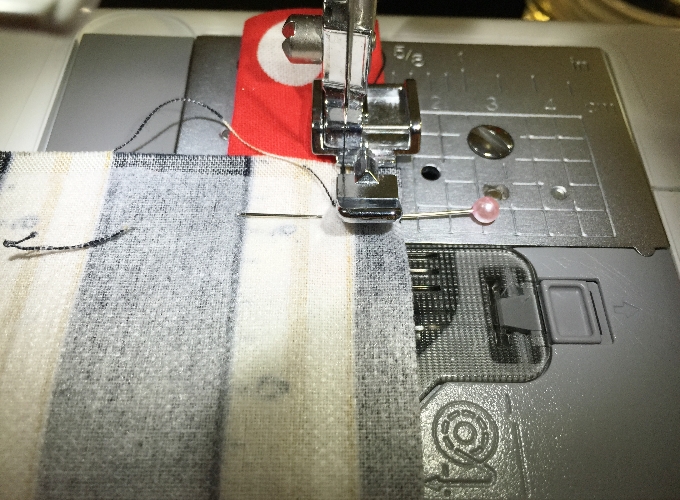
Trim off your threads and reposition your zipper foot from the center to the beginning.
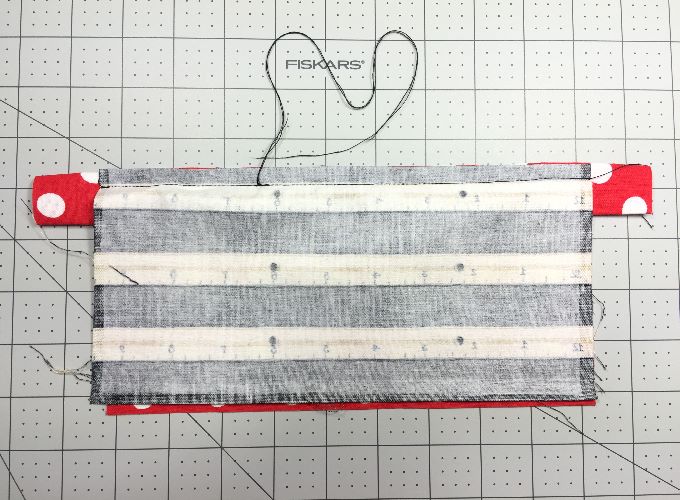
Start sewing again after you have moved the zipper pull. Backstitch the beginning. Continue sewing until you reach the end. Then backstitch.
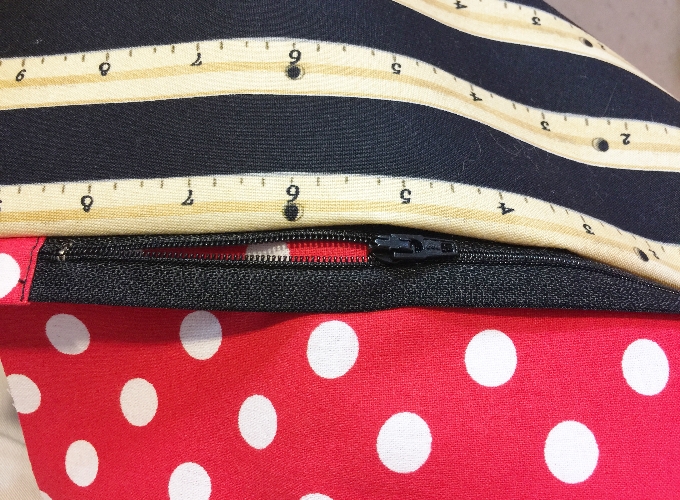
This is how your project looks now.
To finish the instructions, please click on page 2 below!
- Free Snowflake Tumbler Wrap Designs for Download - September 24, 2023
- Free Welcome To Our Farm SVG File - July 17, 2021
- Professional Overthinker SVG File – Download Today! - July 8, 2021
This zipper pouch is so fun! Thanks for the full detailed instructions for us to make our own!
Deb, thank you sew much for checking this post out today! It’s a pleasure to provide free tutorials for everyone!
That ruler fabric is very cute, makes a great pouch!
Thank you, glad you like it!
Great tutorial. I love that ruler fabric too! 🙂 Thanks so much taking part in our tour!!
I’m excited to be part of that tour! Thank you for visiting!!
That pouch is cute! Ohhhhh, I wonder if they make a multiplication table fabric?
That would be awesome! I have to search for that type of print now! 😉 Thanks for visiting!
Yay!!!
This is a great tutorial! I really love your ruler fabric.
Thank you! So glad you like it!
I’m a sucker for a zipper pouch. =) Love the ruler fabric!
Me too! Haha! Thank you for stopping by!
Such great fabric!
Thank you, Susan! Happy you have stopped by today!
This turned out so cute! Thanks for sharing.
Thank you, Christie! So nice that you visited!
Thank you for the tutorial, I’ll make one but for my knitting stuff xD!
Great idea!! Thanks for your visit!
This is just what I was looking for! Thank you so much!
I’m happy you like it, Alison!! Thanks for visiting!
This is a great tutorial! Thank you!
Thank you, Liesel!! I appreciate your visit!
What a great little tutorial! Perfect for back to school.
Thank you so much, Sharon!!
Thank’s for this tutorial!
You are welcome! Thank you so much for stopping by!
Love that ruler fabric, Denise. It’s perfect for a pencil case. I’ve featured your fab tutorial today.
Thank you SEW much!!! I appreciate it!