• Home
  • DIY’s
    • Blogging Tips
    • Contests/Challenges
    • Holidays
      • Christmas
      • Halloween DIY’S
    • Printables
    • Link Parties
    • Aspiring Designers
  • Sewing
    • Holidays
      • Easter Sewing
      • Halloween Sewing
    • Kids
    • Kids Crafts
    • Ladies
    • Sewing Tips
  • Shop Craft Supplies
    • Fabric Shop Directory
    • Pattern Shops Directory
    • Patterns On Sale
    • Sewing Supplies
  • Pattern Reviews
  • Submit A DIY
  • Recipes
  • About
    • Terms of Service – Disclosure Policy
    • Contact
  • Skip to primary navigation
  • Skip to main content
  • Skip to primary sidebar
  • Skip to footer
  • Home
  • DIY’s
    • Blogging Tips
    • Contests/Challenges
    • Holidays
      • Christmas
      • Halloween DIY’S
    • Printables
    • Link Parties
    • Aspiring Designers
  • Sewing
    • Holidays
      • Easter Sewing
      • Halloween Sewing
    • Kids
    • Kids Crafts
    • Ladies
    • Sewing Tips
  • Shop Craft Supplies
    • Fabric Shop Directory
    • Pattern Shops Directory
    • Patterns On Sale
    • Sewing Supplies
  • Pattern Reviews
  • Submit A DIY
  • Recipes
  • About
    • Terms of Service – Disclosure Policy
    • Contact

DIY Crush

Free DIY Patterns & Tutorials

How To Sew Bias Tape

May 2, 2016 by Denise 26 Comments

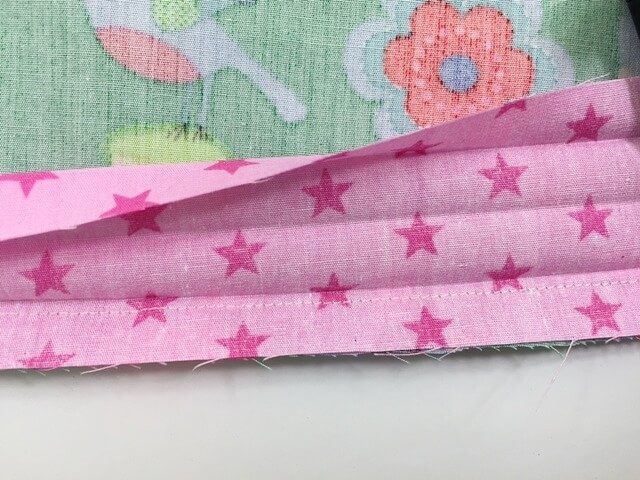
Once done, this is how the stitches look like now:

How To Sew Bias Tape. This tutorial shows you the easy and correct way to sew bias tape.

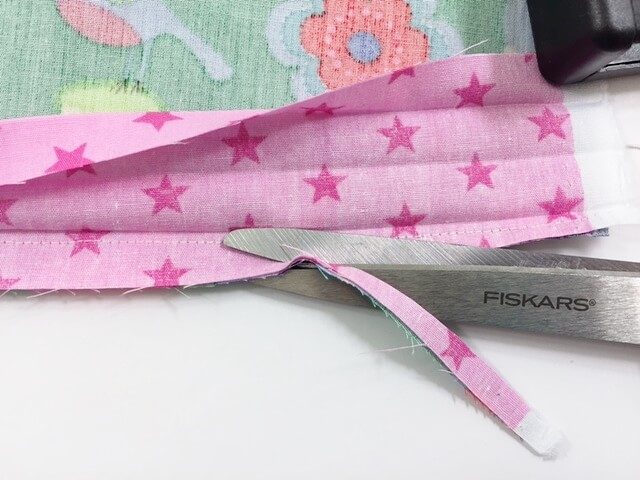
Step 5: This step is not mandatory although I like to reduce some bulk by trimming off about half of the just sewn seam allowance. This will come in handy when sewing with knits as knit fabric is much thicker and reducing the seam allowance will help to get a nicer finish.

How To Sew Bias Tape. This tutorial shows you the easy and correct way to sew bias tape.

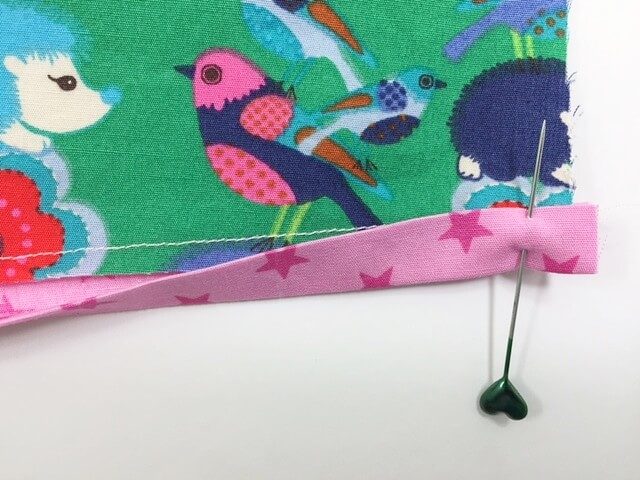
Step 6: Now the fun party comes! Flip your fabric over and fold the bias tape around the bottom edge towards the front. You will now be encasing the raw edges. Pin the bias tape in place and at the same time, cover the stitches. So fold slightly over the stitches.

How To Sew Bias Tape. This tutorial shows you the easy and correct way to sew bias tape.

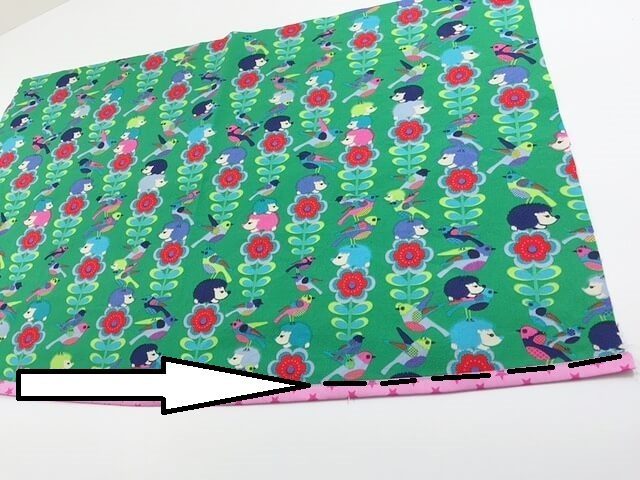
Step 7: Continue to pin the entire area and straight stitch along the upper folded edge of the bias tape.

How to sew bias tape the easy way.

 All done!
 How to sew bias tape the easy way

If you will be sewing bias tape soon, share some pictures in our facebook group! We’d love to see them!

DIY Crush Craft Patterns 

  • Author
  • Recent Posts
Follow me
Denise
Hi! I'm a craft & sewing loving mom of 2 (+ 1 dog). When I am not crafting or sewing, you can find me playing with my kids and dogs! I am a slow cooker & coffee addict. My favorite color is any color and I have a degree in business management. Hope to inspire you to DIY with me!
Follow me
Latest posts by Denise (see all)
  • Free Welcome To Our Farm SVG File - July 17, 2021
  • Professional Overthinker SVG File – Download Today! - July 8, 2021
  • Free Wine Lover SVG Files – Download NOW! - July 7, 2021
Post Views: 8,788
Pages: Page 1 Page 2

Reader Interactions

Comments

  1. LydiaF says

    May 6, 2016 at 3:46 pm

    Your tutorial makes working with bias tape look simple! Thanks for sharing with us at Creatively Crafty! I’ll be sure to pin this. I’m sure it will be helpful for many people.

    Reply
  2. Pam says

    May 11, 2016 at 9:09 pm

    Great tips on working with tape. Thanks for sharing!

    Reply
  3. Kat says

    May 15, 2016 at 11:04 am

    Just realized I had been using bias tape the hard way all this time. This was a great, easy to understand tutorial. Thanks for sharing.

    Reply
  4. Momaof4 says

    May 18, 2016 at 2:33 pm

    I have avoided at all costs using biased tape! I always did it a much harder (much more aggravating and unpolished) way. This is a simple commonsense way to use it thank you!

    Reply
  5. Janet Lambley says

    May 18, 2016 at 6:51 pm

    Great tutorial but a tad confusing when calling the tape bias when clearly the fabric of the tape had not been cut on the bias. I accept that you used a sample piece of fabrics however could be very misleading to sewing beginners.

    Reply
    • Denise says

      May 19, 2016 at 7:15 am

      Yes, you are right! I never mentioned that my “bias” tape was not cut on the bias. I amended the post. Thank you!

      Reply
  6. Lissette says

    June 5, 2016 at 10:18 am

    I also suffer through ugly, wrong side bias tape issues! Thank you for this! I’ll be trying it you way very soon.

    Reply
  7. Samina says

    June 7, 2016 at 11:36 am

    This finally makes it so clear! I’m saving this link for the next time I’ve got to use bias tape.

    Reply
  8. Jen says

    June 18, 2016 at 4:26 pm

    Great tips! Just with the last step, what seam allowance do you topstitch with? Or does it not matter because you will always catch the underside?
    Thanks

    Reply
    • Denise says

      June 19, 2016 at 8:34 am

      Thank you for visiting today, Jen! I use about 1/8″ seam allowance just to be sure to “cover” the stitches underneath well enough 😉

      Reply
  9. Nancy M. Daniel says

    June 19, 2016 at 4:34 pm

    Well. This is so perfect and easy to understand! Thank you!

    Reply
    • Denise says

      June 19, 2016 at 8:39 pm

      Thank you so much, Nancy! I appreciate your visit!

      Reply
  10. Linda says

    June 19, 2016 at 4:40 pm

    Please forgive me from interfering – I am so old school, i.e. early 1960’s (if not late 50’s). I was not only taught to sew by hand, with the rare treat of taking a turn to use the single hand sewing machine. We had to line up the tape/bias tape right sides together. The complete reverse of your picture. Sew along the crease, fold the tape under and then slip stitch. This had to be under the line of machine stitching. No hand stitches were allowed to show on the front of the garment . Slow I know but a perfect finish for that special garment. Sorry not “techy” enough to demonstrate with examples.

    Reply
    • Denise says

      June 19, 2016 at 8:38 pm

      That is the way this task was taught, I believe it! I remotely remember that from my mom actually. Thanks so much for visiting today!

      Reply
    • Michele says

      April 22, 2017 at 11:42 pm

      The problem with sewing along the crease is you have left nothing for turn of the cloth, which can leave a rather messy looking turn. I sewed bias tape (or non bias on straight edges) exactly the way it was demonstrated here until sewing machine companies came out with bias tape feet. With these feet there is no need to pin and your machine will catch both the top and bottom layers at the same time. The only problem is that those feet are pricey, so unless you have sufficient disposable income and/or sew a lot of bias tape, they may not be worth the money.

      Reply
      • Denise says

        April 27, 2017 at 5:29 pm

        Thanks for your comment! I agree that sewing directly along the crease won’t leave any room for turning. That’s why I tried to showcase how to sew slightly next to the crease. I have yet to check out the bias tape feet! 😉

        Reply
      • LHY says

        May 16, 2017 at 8:24 pm

        Me too! I love having a bias tape foot as it makes the project take half as long and results in a well sewn project!

        Reply
      • Ev says

        July 29, 2017 at 11:55 am

        Thank you for explaining why you don’t sew along the crease. I was looking for this in the text above. I was reading the comments hoping it would be mentioned. I teach kids to sew and didn’t know this, They often want to know “why” they have to do something, and I admit I do too.

        Reply
        • Denise says

          July 31, 2017 at 10:04 am

          Thank you for reading this post! That is a very good question that I need to add in there. The reason to NOT sew along the crease is that you will have a little bit of extra room once you fold the binding over. Otherwise, if sewn along the crease, your binding fold may not allow for the necessary room to cover the stitches on the other side. I like to even trim off some of the seam allowance to achieve less bulk as well. This step helps me to get a nice and neat looking binding.

          Reply
  11. Kristen says

    July 5, 2016 at 10:16 pm

    This method from the wrong side is great if you want to show the contrast fabric however often times bias tape is used as a hidden finish. You do the same technique right side to right side and finish on the wrong side concealing the bias tape from the right side.

    Reply
    • Denise says

      July 6, 2016 at 6:23 pm

      Yes, correct! So happy you stopped by!!

      Reply
    • Denise says

      July 8, 2016 at 11:04 am

      Glad you like this tutorial and I agree, great for finishing hems by concealing the bias tape! This might be my next binding tutorial 😉

      Reply
  12. Debbie Cooper says

    October 26, 2016 at 1:19 am

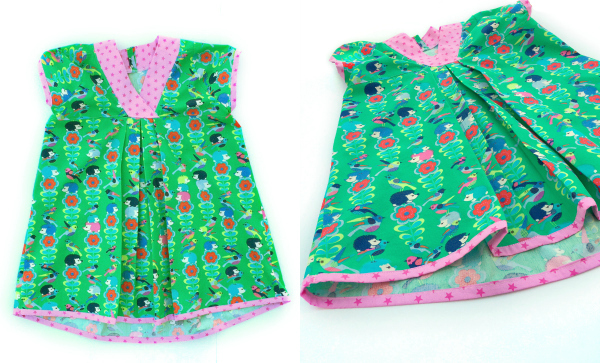
    Love your pictures and detailed tutorial that makes it look so pretty and easy! Can I ask what pattern the beautiful dress was made from. Love it and want to try it out with a pattern like that.

    Reply
    • Debbie Cooper says

      October 26, 2016 at 1:20 am

      Sorry , saw the name of the pattern after writing my comments.

      Reply
      • Denise says

        October 26, 2016 at 7:30 am

        Hey, no problem! Thank you for reading this post! I’m glad you like the tutorial and pattern!

        Reply
  13. Val Ward says

    January 10, 2018 at 3:59 pm

    Thank you

    Reply

Leave a Reply Cancel reply

Your email address will not be published. Required fields are marked *

Primary Sidebar

  • Facebook
  • Google+
  • Instagram
  • Pinterest
  • RSS
  • Twitter
  • YouTube

Popular Posts

  • Free PJ Pattern Featuring Organic Cotton Plus Knit Fabric Free Knit Pajama Sewing Pattern under Kids, Sewing
  • Free Fleece Mittens Sewing Pattern at DIY Crush Free Fleece Mittens Sewing Pattern under Kids, Sewing

This blog contains affiliate links.

See our disclosure policy in the 'Terms & Conditions' at the bottom of this page.

Get on the freebie list

Footer

Archives

See us on Pinterest

Visit DIY Crush Marketplace's profile on Pinterest.

Looking For Something?

  • Home
  • DIY’s
    • Blogging Tips
    • Contests/Challenges
    • Holidays
      • Christmas
      • Halloween DIY’S
    • Printables
    • Link Parties
    • Aspiring Designers
  • Sewing
    • Holidays
      • Easter Sewing
      • Halloween Sewing
    • Kids
    • Kids Crafts
    • Ladies
    • Sewing Tips
  • Shop Craft Supplies
    • Fabric Shop Directory
    • Pattern Shops Directory
    • Patterns On Sale
    • Sewing Supplies
  • Pattern Reviews
  • Submit A DIY
  • Recipes
  • About
    • Terms of Service – Disclosure Policy
    • Contact

© 2022 · DIY Crush · Terms and Conditions

This website uses cookies to improve your experience. We'll assume you're ok with this, but you can opt-out if you wish.Accept Read More
Privacy & Cookies Policy

Privacy Overview

This website uses cookies to improve your experience while you navigate through the website. Out of these, the cookies that are categorized as necessary are stored on your browser as they are essential for the working of basic functionalities of the website. We also use third-party cookies that help us analyze and understand how you use this website. These cookies will be stored in your browser only with your consent. You also have the option to opt-out of these cookies. But opting out of some of these cookies may affect your browsing experience.
Necessary
Always Enabled
Necessary cookies are absolutely essential for the website to function properly. This category only includes cookies that ensures basic functionalities and security features of the website. These cookies do not store any personal information.
Non-necessary
Any cookies that may not be particularly necessary for the website to function and is used specifically to collect user personal data via analytics, ads, other embedded contents are termed as non-necessary cookies. It is mandatory to procure user consent prior to running these cookies on your website.
SAVE & ACCEPT
 

Loading Comments...