• Home
  • DIY’s
    • Blogging Tips
    • Contests/Challenges
    • Holidays
      • Christmas
      • Halloween DIY’S
    • Printables
    • Link Parties
    • Aspiring Designers
  • Sewing
    • Holidays
      • Easter Sewing
      • Halloween Sewing
    • Kids
    • Kids Crafts
    • Ladies
    • Sewing Tips
  • Shop Craft Supplies
    • Fabric Shop Directory
    • Pattern Shops Directory
    • Patterns On Sale
    • Sewing Supplies
  • Pattern Reviews
  • Submit A DIY
  • Recipes
  • About
    • Terms of Service – Disclosure Policy
    • Contact
  • Skip to primary navigation
  • Skip to main content
  • Skip to primary sidebar
  • Skip to footer
  • Home
  • DIY’s
    • Blogging Tips
    • Contests/Challenges
    • Holidays
      • Christmas
      • Halloween DIY’S
    • Printables
    • Link Parties
    • Aspiring Designers
  • Sewing
    • Holidays
      • Easter Sewing
      • Halloween Sewing
    • Kids
    • Kids Crafts
    • Ladies
    • Sewing Tips
  • Shop Craft Supplies
    • Fabric Shop Directory
    • Pattern Shops Directory
    • Patterns On Sale
    • Sewing Supplies
  • Pattern Reviews
  • Submit A DIY
  • Recipes
  • About
    • Terms of Service – Disclosure Policy
    • Contact

DIY Crush

Free DIY Patterns & Tutorials

Easter Chick Sewing Pattern

March 21, 2017 by Denise Leave a Comment

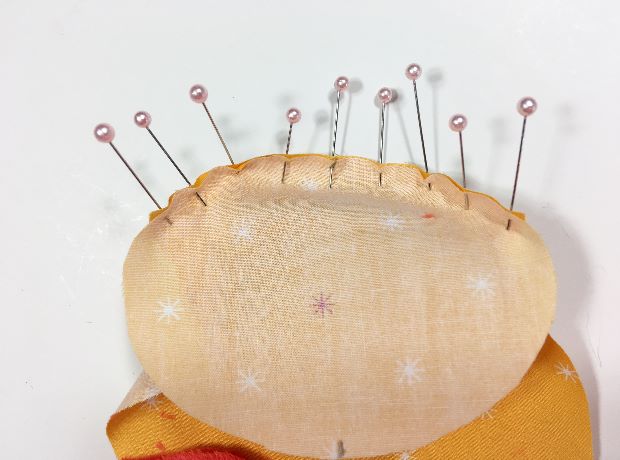
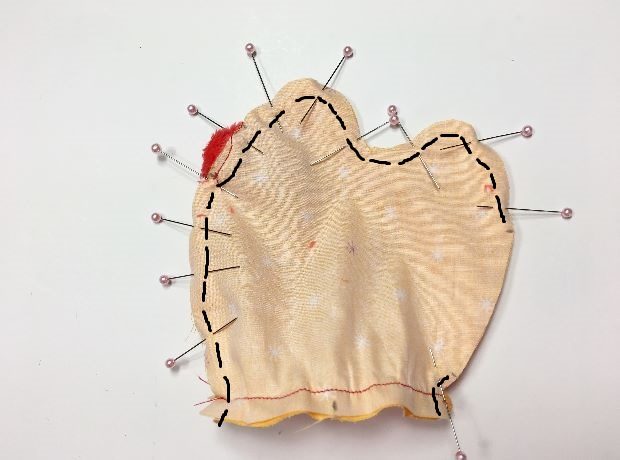
Place a pin every 3/8-1/2″ backwards (it will be easier to sew).

Free Easter Chick Sewing Pattern DIY Crush

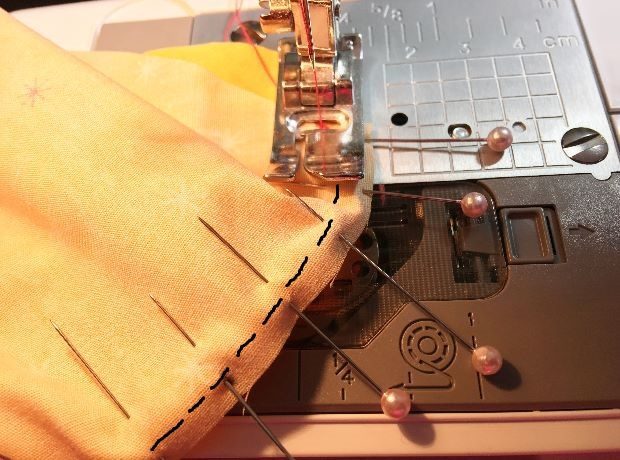
Place the pinned area with the underside facing down, onto your sewing machine and start sewing at the marking on the main chick piece. See along the edge (shown with dashes). Remove the pin one by one right before you sew over it. Keep a seam allowance of 3/8″. Only sew until you reach the other marking on the main chick piece.

Free Easter Chick Sewing Pattern DIY Crush

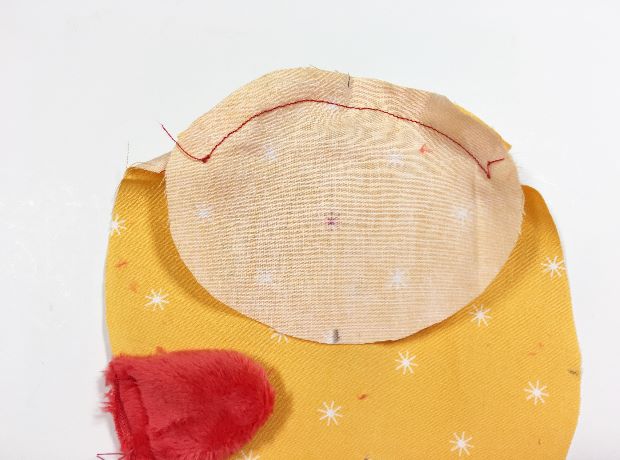
This is now the sewn area.

Free Easter Chick Sewing Pattern DIY Crush

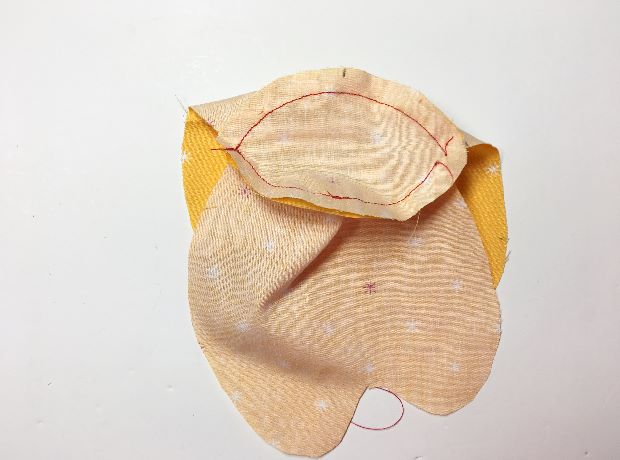
Repeat with the other main chick piece and sew it to the opposite side of the underside piece.

Free Easter Chick Sewing Pattern DIY Crush

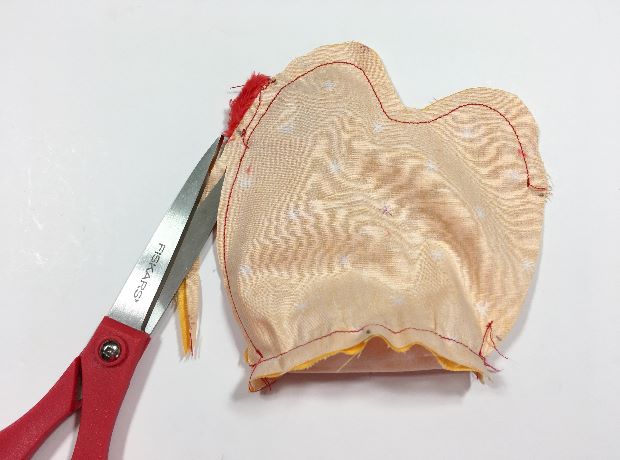
Now it’s time to sew both sides together. Pin both chick main pieces together as shown. Leave the opening unpinned. Sew starting at the left bottom and end right at the top marking for the opening. Backstitch. Then sew the little area on the bottom of the right side. Backstitch again.

how to make a Easter chick

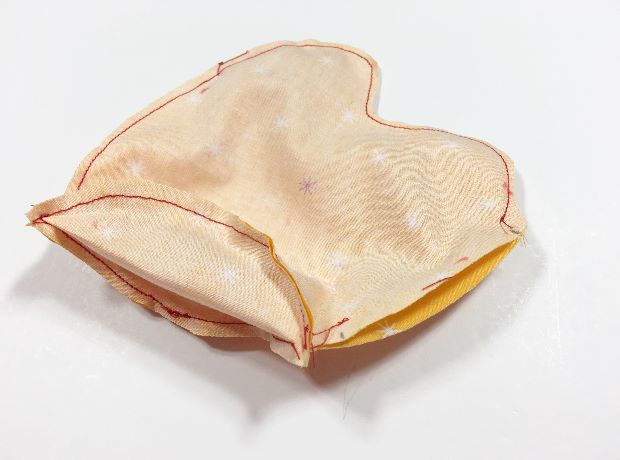
Trim off about half of the seam allowance all the way around but spare the opening.

Chick pattern to sew by DIY Crush

Now it’s time to turn the chick with right sides out.

Free Easter Chick Sewing Pattern DIY Crush

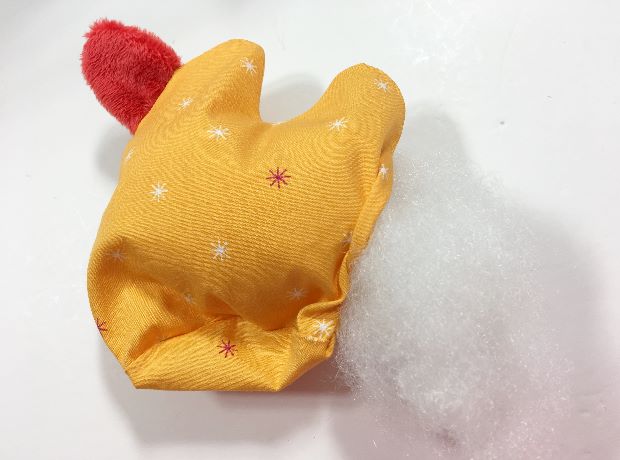
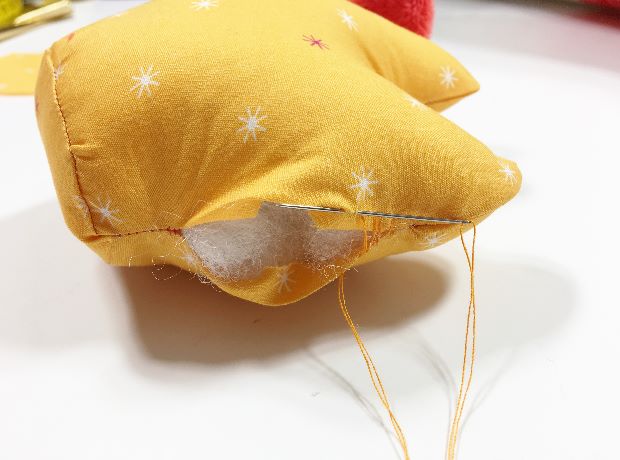
Stuff the chick with a good amount of fiberfill and stuff the head and tail first as firmly as possible. Stuff the rest a bit loser so the chick’s underside will remain somewhat flat enough for it to stand up. Otherwise it will be too wobbly and will tip over easily. You can also add some pellets to the bottom to give it some weight. I omitted the pellets for this one but my next one will have them 😉

Free Easter Chick Sewing Pattern DIY Crush

Whipstitch the opening closed.

Free Easter Chick Sewing Pattern DIY Crush

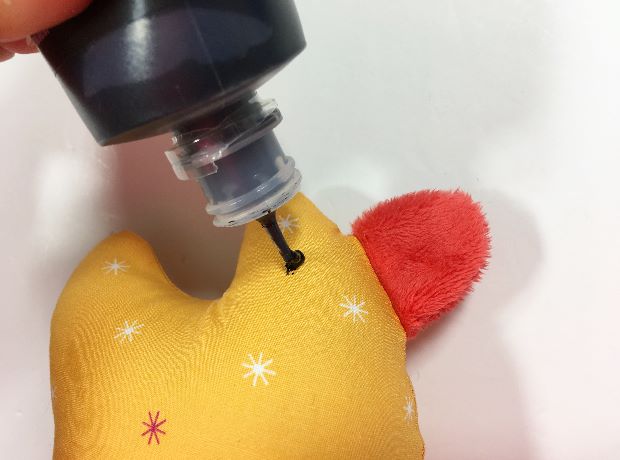
Place a 1/4-3/8″ round dot right into the center of the head to make the eyes. Let it dry for at least 24 hours before handling this chickie. And you are done! It’s time to make about 11 more until Easter!

Free Easter Chick Sewing Pattern DIY Crush

I hope you enjoyed this free Easter chick sewing pattern and will check out my other free Easter sewing projects!

Chick sewing pattern for download DIY Crush


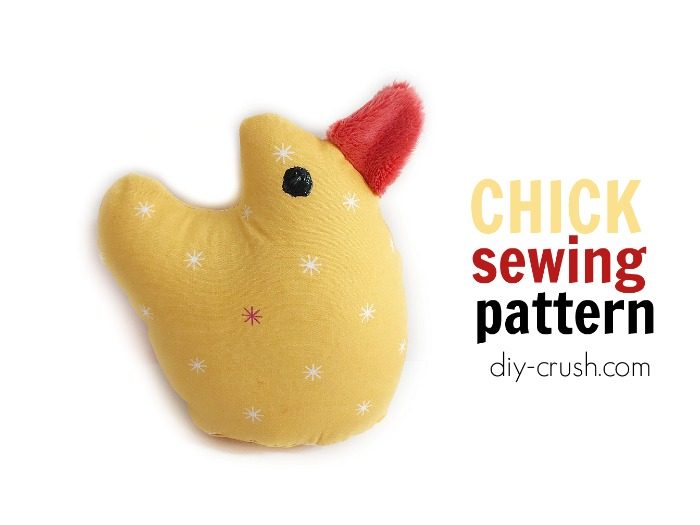
For more cute Easter sewing projects, please check out my other free bunny tutorials and patterns.

DIY Crush Craft Patterns

  • Author
  • Recent Posts
Follow me

Denise

Hi! I'm a craft & sewing loving mom of 4 (+ 2 dogs). When I am not crafting or sewing, you can find me playing with my kids and dogs! I am a slow cooker & coffee addict. My favorite color is any color and I have a degree in business management. My 24/7 job is DIY Crush and Whimsy Couture, besides being a mom. Hope to inspire you to DIY with me!
Follow me

Latest posts by Denise (see all)

  • Easy Tee Pattern For Girls - August 2, 2017
  • How To Make A Halter Romper With A Closed Back - July 17, 2017
  • How To Add Leg Bands To A Romper Pattern - June 27, 2017
Pages: Page 1 Page 2

Reader Interactions

Leave a Reply Cancel reply

Your email address will not be published. Required fields are marked *

Primary Sidebar

  • Facebook
  • Google+
  • Instagram
  • Pinterest
  • RSS
  • Twitter
  • YouTube

Popular Posts

  • Free PJ Pattern Featuring Organic Cotton Plus Knit Fabric Free Knit Pajama Sewing Pattern under Kids, Sewing
  • Baby Bow Turban Beanie Pattern under Kids, Sewing

This blog contains affiliate links.

See our disclosure policy in the 'Terms & Conditions' at the bottom of this page.

Get DIY’S Into Your Inbox!

Footer

Archives

See us on Pinterest

Visit DIY Crush Marketplace's profile on Pinterest.

Looking For Something?

  • Home
  • DIY’s
    • Blogging Tips
    • Contests/Challenges
    • Holidays
      • Christmas
      • Halloween DIY’S
    • Printables
    • Link Parties
    • Aspiring Designers
  • Sewing
    • Holidays
      • Easter Sewing
      • Halloween Sewing
    • Kids
    • Kids Crafts
    • Ladies
    • Sewing Tips
  • Shop Craft Supplies
    • Fabric Shop Directory
    • Pattern Shops Directory
    • Patterns On Sale
    • Sewing Supplies
  • Pattern Reviews
  • Submit A DIY
  • Recipes
  • About
    • Terms of Service – Disclosure Policy
    • Contact

Notice: genesis_footer_creds_text is deprecated since version 3.1.0! Use genesis_pre_get_option_footer_text instead. This filter is no longer supported. You can now modify your footer text using the Theme Settings. in /home/nginx/domains/diy-crush.com/public/wp-includes/functions.php on line 4716

© 2019 · DIY Crush · Terms and Conditions

This website uses cookies to improve your experience. We'll assume you're ok with this, but you can opt-out if you wish.Accept Read More
Privacy & Cookies Policy

Necessary Always Enabled