Bows are a girls best friend, at least that’s what I think. If you add a bow to a plain, boring piece of clothing watch what happens. It becomes girly! Here is a quick way of adding a bow to any piece of clothing. See the tutorial of how to sew a cute bow below.
⇓ – – – – – PIN THIS – – – – – ⇓
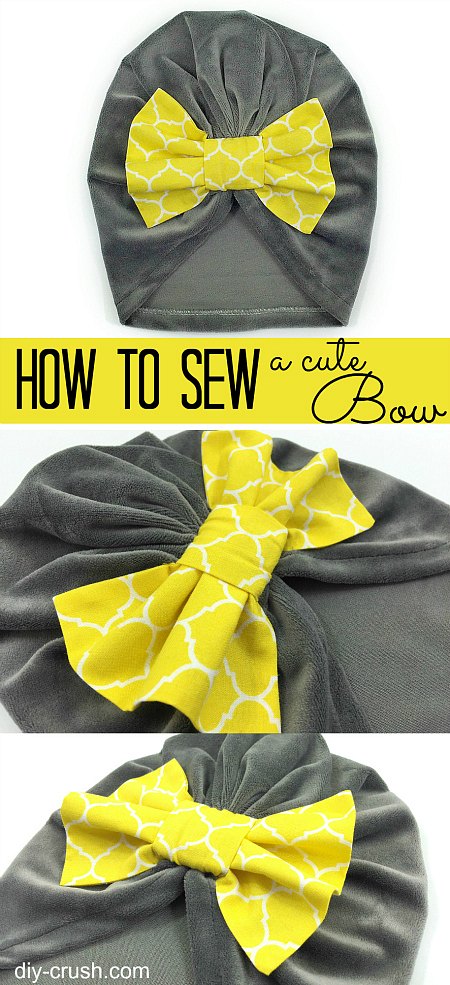
How to sew a cute bow
No matter what piece of clothing you choose, chances are that a bow will fit! In today’s free tutorial I am using a beanie made from Whimsy Couture’s Bow Turban Hat sewing pattern which originally has a bow but I wanted one without a knot in the center. The idea was brought to me a while back when Rebekah tested this pattern for me. She made the cutest bow turban hat for her daughter and wrote a tutorial on how she added a small band to cover the gathered area which is a super idea!

What You Need
- a piece of clothing to girly up like a beanie
- fabric (1 piece 13″x6″ and 1x in 2.5″ x 5″ which fits nicely onto a size 2t beanie)
- sewing machine
- cutting mat
- rotary cutter
- straight pins
- scissors
- iron
- double threaded hand sew needle
Follow the step by step instructions
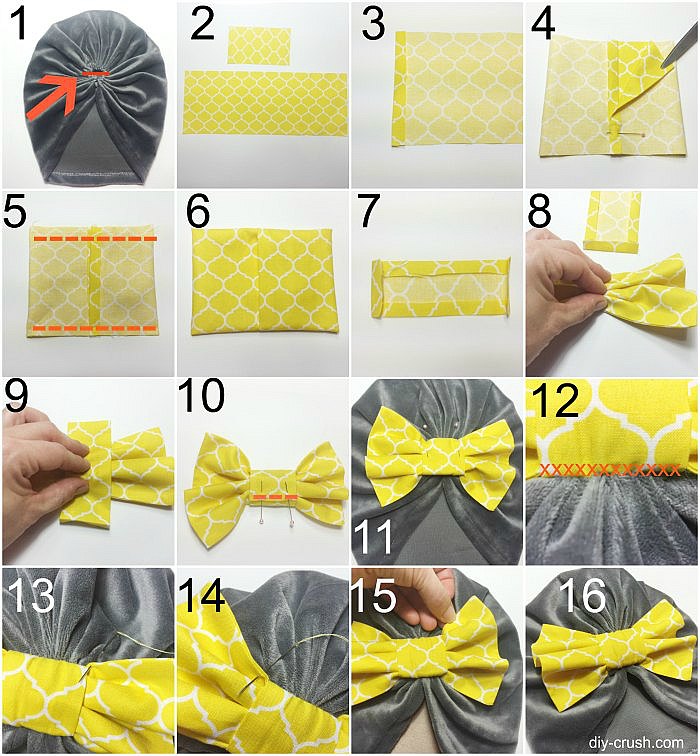
- If you are making the bow turban hat you want to measure the area to be covered so you can make sure the middle part of the bow will be big enough to cover the gathered area well.
- Cut the bow pieces from the fabric of your choice.
- Fold the short ends of your larger fabric piece 1/2 inch in and press.
- Fold the short, folded edges in towards the center with wrong sides out. Let the folds slightly overlap in the center.
- Pin and sew the long raw edges. Backstitch the beginning and the end.
- Turn this piece with right sides out making sure to push all corners out and press.
- Take your small piece of fabric and fold all four edges 1/2″ in and press.
- Take your larger bow piece and grab it in the center and squeeze it together.
- Place the small bow piece with right sides up onto the squeezed center area.
- Flip both pieces over together and fold the short ends of the center piece over and let them overlap.
- Pin in place and check now if the gathered area on the hat will be covered well enough by the center piece. If not, adjust and repin. Also make sure that the bow will look good before sewing the center area in place. If it looks good it’s time to pin the bow to the hat.
- With your double threaded hand sew needle, stitch first one side of the bow to the hat. This image shows the area between the bow and the hat. Use a slip stitch so the stitches won’t be visible. See a video of what a slip stitch is here. Repeat with other side. Be sure to double knot the threads before trimming them off.
- In order to make the bow look good you want to spread out the sides a bit and tack them down as shown.
- I usually do this near the center and at the corners.
- If the bow looks pretty….
- …. you are done!

Thanks for reading this post! If you love more free projects and sewing patterns, please click HERE!
- Free Snowflake Tumbler Wrap Designs for Download - September 24, 2023
- Free Welcome To Our Farm SVG File - July 17, 2021
- Professional Overthinker SVG File – Download Today! - July 8, 2021
This is so cute! I can’t wait to make a hat like this for my daughter. 😀 Thank you for sharing this awesome post.
Thank you so much!!
I work with 29 other ladies in my group we all are volunteers for the Ladies Cancer and Children’s cancer for patients. We make nice pillow cases and turbans……….I never thought of adding bows. Going to print this out for the ladies and going to jazz them up. May even put a bow on the pillow cases too. Thank you so much for this tutorial.